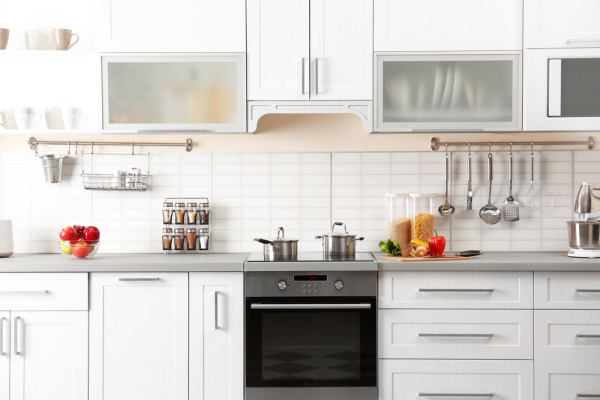
In often cases, the kitchen is what holds properties back from selling quickly. Not everyone can afford to replace a full kitchen, but with some pointers, and a few YouTube tutorials along the way, you can learn how to make affordable improvements yourself. Without breaking the bank.
A typical 8-unit kitchen that provides 10m2 of storage space can cost at least £1000. A larger kitchen however, requiring 20-units, giving 30m2 could be more like £7000 and that’s not even including the worktops, appliances or installation fees. Besides, if you were going to invest that much money, you’d want it to be for your own kitchen that you can enjoy yourself! With our kitchen guide, you can transform your kitchen space for under £80!
Before we start, you will need: (For the best quality supplies, head to Dulux or Johnstones.)
• Dust sheets! Old bed sheets will do too or these can be ordered online for as little as £1.
• Degrease wipes £2 from any supermarket
• Advanced primer in white £8
• Water based acrylic satin, mixed in any colour you want £9
• Foam roller £4
• Paint brush pack £11
• Mini roller bucket £3
• Knotting solution £7 (if necessary)
• New cupboard furniture, around £20
• Sanding pad pack £4
Step 1. PREP
Start by removing cupboard and draw furniture (handles and knobs.) Use a screwdriver to do so, usually either a flat head or a Philips. Then start sheeting the floor. You don’t want any paint splashes on your tiled floor (use masking tape to secure if you’re worried.) With your sanding pad, start going over the ins and out of your cupboards. Be thorough and make sure all food splashes are rubbed off. Dust down well. Then with the degrease wipes, give everywhere a wipe down. This is important and if done properly will help the paint sit better on the surface.
Step 2. BARE WOOD?
This step is only for those who will be transforming bare wood units. After wiping down, get your knotting solution and with a cloth or thin paint brush, ensure all wood knots are covered well. If you don’t know what a knot looks like, give it a google! We use this so the darkness of the knots, don’t shine through under the paint, especially if it’s a light colour. This dries instantly, so about fifteen minutes later move on to the next step.
Step 3. PRIME.
With a 1.5-inch paintbrush start applying the advanced primer. This removes the porosity creating a smooth coat ready for the following final coats. To get the best outcome do two coats, just to get a good coverage, avoiding any other colour or wood flashing through. Leave around 3 hours in-between coats and overnight for the last.
Step 4. PAINT.
Grab the water based acrylic satin, a clean brush, foam roller and mini roller bucket. This stage can vary depending on what cabinets you have. If you just have flat doors and draws, then that’s easy! If you have grooved or paneled cabinets, then this will require just a little more attention. For flat doors, with the brush, paint the outskirts of the door. Do one door at a time and don’t do a wide area, keep it neat and narrow. Coat the roller well in the acrylic satin and spread evenly over the entire door and lay it off well so there are no bubbles and is evenly covered. Don’t forget to do the side of the opened door as well. Don’t apply any more paint to the roller, just run it up and down and it will cover perfectly. If you want to do inside the cabinets as well then repeat this process.
For grooved or panelled doors, paint with a brush the panels and grooves, if there is an area larger than the width of your roller, roll it. If it is smaller and needs the paint to be worked into it, then stick with a brush. Lay it off well with the roller again to make it smooth and even. Using a foam roller will eliminate any brush marks and will make it look like the cabinets were that colour to begin with!
Make sure all edges are painted. This stage needs two coats, so wait 6 hours between coats and then overnight after the final. You might be thinking this will take up too much time, but I would say it’s much better than having fitters in and leaving you without a kitchen for a couple of days.
Step 5. DRESS.
This is the fun part. Now everything has dried, removed the sheets. To make the kitchen more modern and in keep with the transformation, you may want to replace the furniture. You can get a pack of four handles from Wilko for £6. When putting these on, be careful not to scratch your masterpiece! Dress with a new fruit bowl, a fresh bunch of flowers or some hanging green plants.
There are millions of hints and tips found online. Look through Pinterest for colour inspiration and watch any YouTube videos along the way if you find yourself struggling. Just by doing this can really increase your chances of selling. A major kitchen remodel only returns around 80% on to your investment, a minor remodel like revamping your cabinets, has an 87% return!
For £80, it’s a no brainer.